My first exposure to aerial photography was at an antique boat gathering. A friend of the organizer had a DJI Phantom 2 Vision+ drone. He launched it off a large center console fiberglass boat and produced some nice footage of our club’s antique boats zipping around the lake.
The perspective from above is quite unique. However, I wasn’t a fan of the fish eye look, a result of the ultra wide angle lens packaged with the attached camera. You can fix that distortion to an extent in post, but as excited I was about the potential of getting my own drone, I decided to hold off until the camera was upgraded.
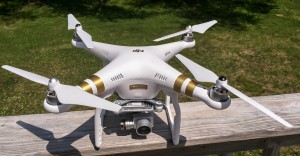
Enter the latest offering from DJI, the leader in ready to fly quadcopters – the Phantom 3. It comes in two configurations, the Professional and the Advanced. The only difference is the Professional has 4K video capability where the Advanced has 1080p. And the charger for the Pro is higher capacity, so your batteries change slightly faster. I preordered a Pro kit packaged with a spare battery when it became available. A month later, a box arrived directly from China. Time to learn how to fly!
Eager as I was to get in the air, I certainly didn’t want to crash the new toy on the first outing, so I did the due diligence and read the manual cover to cover as well as browsed several related forums online. Eventually it was time to get the bird in the air.
There are plenty of unboxing videos and first time walk through of the drone and controller tutorials, so I won’t bother to replicate that…instead, I would like to share my thoughts and feelings about the product from a first time user. For starters, the manual is basic and….well, lacking in details. Before you can fly, you have to download the Pilot App to your smart phone or tablet. I decided to use my iPad rather than my iPhone for the larger screen real estate. The current manual does not go into any details about the app so it takes a little poking around. The controls and terminology can be intimidating to one who isn’t familiar with aviation. I’ve flown in enough small planes with friends, I could figure most of it out readily.
Time to get airborne. There is a beginner mode that limits you to about 100′ vertical and 100′ horizontal, so I tried that first. The controls are smooth and the drone reacts well to input. I slowly hovered then maneuvered around the yard getting the hang of things. Of course, the photographer in me wanted to try the camera right away, but the first couple of flights I took it easy, made sure I was comfortable with what the sticks did and learned where to look for flight telemetry and data. After the warm up, I was ready to start shooting.
The camera controls are a bit different than the DSLRs that I am used to. The unit is a fixed aperture at f/2.8, you then adjust ISO and shutter to control the exposure. I supposed for the overhead perspective, DOF isn’t really an issue, but it would be nice to control that as well. The app can do a single shot, burst mode, HDR and bracketed shots, up to five, for stills. The video control allows you to shoot in various resolutions up to 4K and at various frame rates. For the first few videos and stills, I used the default settings while I was still becoming accustomed to being the pilot as well. The camera can capture jpeg as well as raw files, so I shot raw to see what I could do with them in Lightroom.
Flight time is very limited. DJI advertises about 23 minutes, but in the beginning, you are supposed to condition the battery by not draining it all the way, so my early flights are in the 10-12 minute range. Laws are sketchy here in the US, but from what I could ascertain, you aren’t supposed to fly within five miles of a major airport (not a problem for me) and no higher than about 400′. Eventually, the FAA will solidify the rules. So I tried to stay within those guidelines, however, it’s pretty easy to zoom up higher than 400′ in a real short time, so you have to watch your altitude.
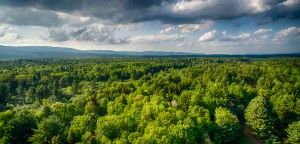
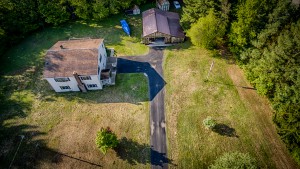
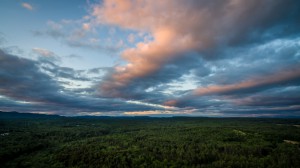
These first shots were with the camera defaults. I found the raw files to be on the soft side. After all, it is only a 12mp camera and I’m used to my full frame 22mp Canon – but if you kept the image size small, it was adequate. In Lightroom, the raw files certainly didn’t have a lot of headroom compared to the DSLR. Getting the exposure right in camera is pretty critical, or bracketing shots would be helpful. Even the bracketed shots merged to HDR in Lightroom produced significant grain to the extent that you have to be heavy handed with the noise reduction.
But what was I expecting, a 5D Mark III in the air? There are drones that could carry that at price points more than the camera body. I think for the price of the Phantom 3, the unique perspective you can shoot from, the quality is quite good. The technology will change fast, better cameras, better drones, and in a few years, the perspective won’t be so unique. For now, the Phantom 3 is a serious contender in the aerial photography arena at a cost that is affordable to most. I makes a nice addition to a photog’s kit.


Leave a reply